DNS is still a lesser known thing for an average internet user. So, let’s check what’s Private DNS, it’s benefits, and how to set it up on iOS and Android.
In today’s digital age, privacy is more important than ever. With the constant invasion of our personal information through various online platforms, it’s essential to take control of our privacy wherever we can.
One way to do this is by setting up a private DNS on our devices, particularly smartphones. Private DNS allows us to better protect our data from third parties, including internet service providers and government agencies.
According to a report from the Electronic Frontier Foundation, “ISPs can see and record every site you visit and every app you use — even if you’re using a VPN.” By setting up a private DNS, we can add an extra layer of protection to your online activities.
In this post, we’ll explain what private DNS is and how to set it up on both iOS and Android devices.
But first, let’s revise some basics.
What is DNS?
Domain Name System (DNS) is the phonebook of the internet. It helps match the domain name (ex. mustechie.com) we type into web browsers to computer-readable IP addresses (ex. 124.25.47.10).
DNS servers do this behind the scenes and can track which websites you visit. This is normally handled by our internet service provider (ISP).
While this isn’t a problem with privacy respecting countries, others, especially living in authoritarian regimes have much to protect against.
This is where custom DNS comes into picture, where you easily change the DNS servers to redirect DNS requests to someone uninterested with your web activity.
However, private DNS goes a few steps ahead.
What is Private DNS?
Private DNS is a security feature that uses the HTTPS and TLS protocols to encrypt the connection between a client (e.g., a computer or smartphone) and a DNS (Domain Name System) server.
This helps to protect the privacy of the client’s DNS requests and prevent third parties intrusion. The terms DoH (DNS over HTTPS) and DoT (DNS over TLS) are often used to refer to DNS requests sent through these protocols.
It mostly shields from snooping, which can lead to more sophisticated and targeted cyber crimes.
Overall, it can effectively enhance the security and privacy of your online activities.
Setting Private DNS on Android
Follow these steps to set up a private DNS on an Android device:
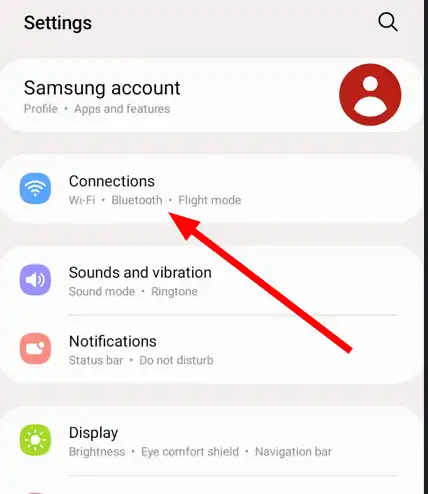
Go to the “Settings” app on your Android device. Next, tap “Connections” to open the network settings. Please remember, this can have a different name based on the smartphone.
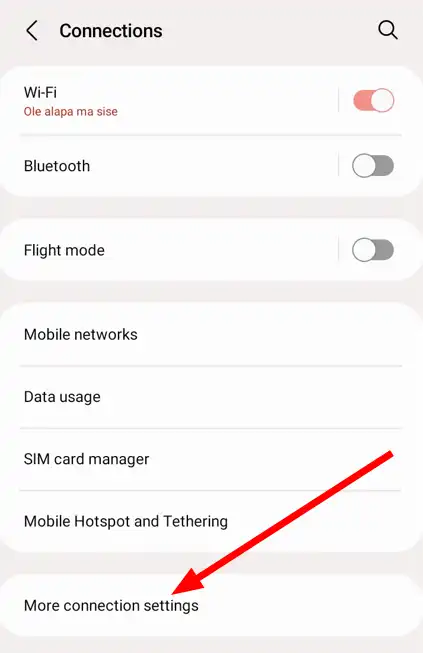
Now enter into More connection settings.
You will see Private DNS is set to Automatic by default.
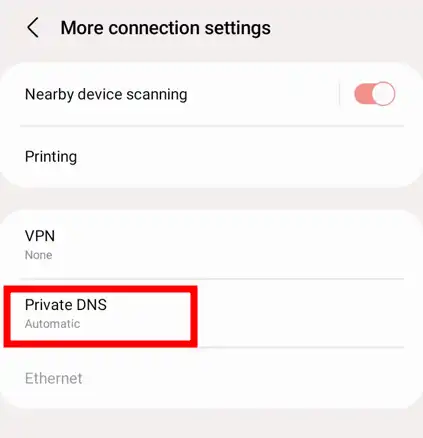
Tap it, and enter the custom DNS server address into the “Private DNS provider hostname“.
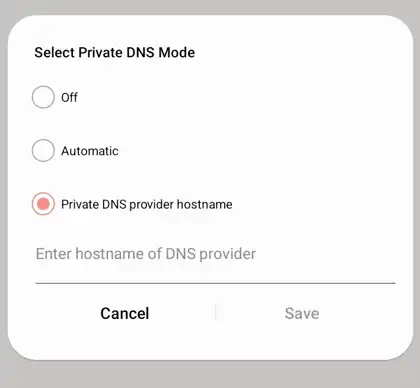
For instance, you can use dns.google for using Google public DNS severs. Besides, enter one.one.one.one for deploying Cloudflare DNS.
Your Android device should now be using the private DNS server you specified.
Notably, DNS requests will only be encrypted for Android 9 and up.
Setting Custom DNS on iOS
Similar to Android, using custom DNS on iOS is straightforward. However, encrypting DNS requests requires a bit more effort.
Follow these steps to set up a private DNS on an iOS device:
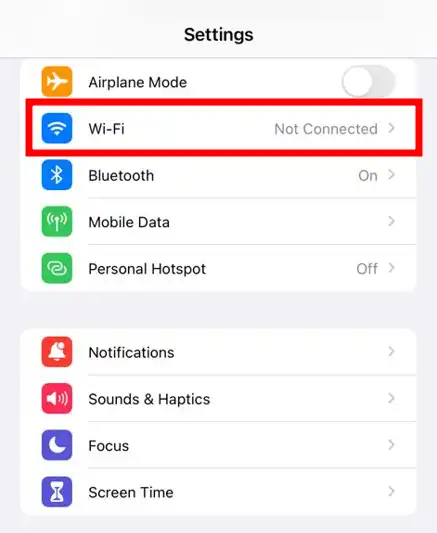
Go to the “Settings” app on your iOS device, and tap “Wi-Fi” to open the Wi-Fi settings.
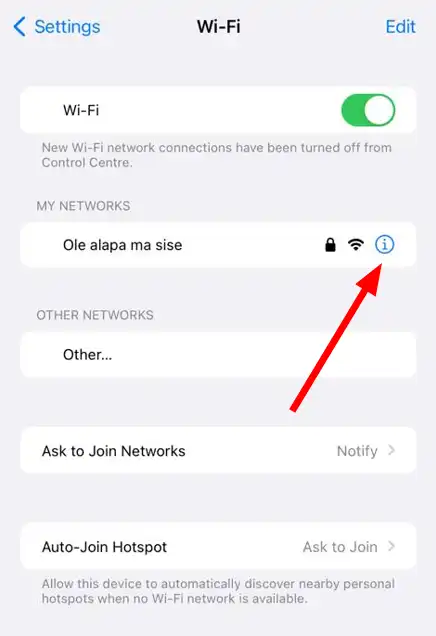
Tap “i” next to the Wi-Fi network you are currently connected to.
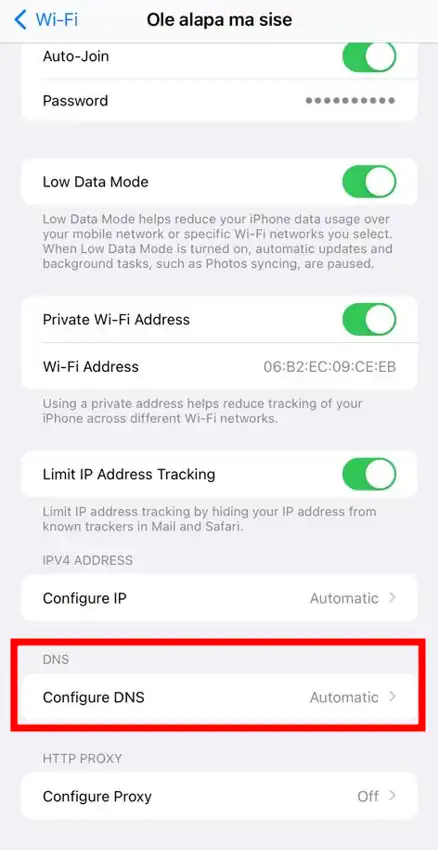
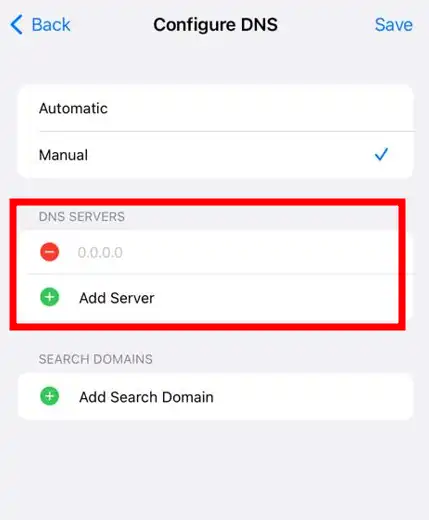
Tap “Configure DNS” under the DNS section.
Next switch to “Manual” to enter manual DNS settings and tap “+” to add a new DNS server.
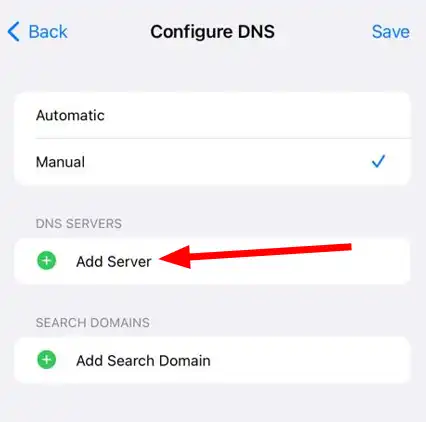
Subsequently, enter the DNS server address you want to use. There are several private DNS servers available, including Cloudflare (1.1.1.1), OpenNIC (192.95.54.3), and Quad9 (9.9.9.9).
Finally, “Save” to apply the changes.
It is important to remember that the custom DNS server you have specified will only apply to the Wi-Fi network you are currently connected to.
So if you want to use the custom DNS server on all Wi-Fi networks, you will need to repeat these steps for each network. This is necessary to ensure that your private DNS server is active and functioning properly on all networks.
Please note, iOS doesn’t support private DNS natively like Android. So, this won’t encrypt the DNS requests, unless you do some additional work mentioned over below:
Encrypting DNS Requests on iOS
There are many ways to do this, but the simplest is using Cloudflare’s free 1.1.1.1. app.
And if you choose this way, you will not need to configure custom DNS in iOS settings. Using this app will do the work for you.
Coming to the app, it has two modes, one for encrypted DNS (1.1.1.1) and another one is WARP (a VPN).
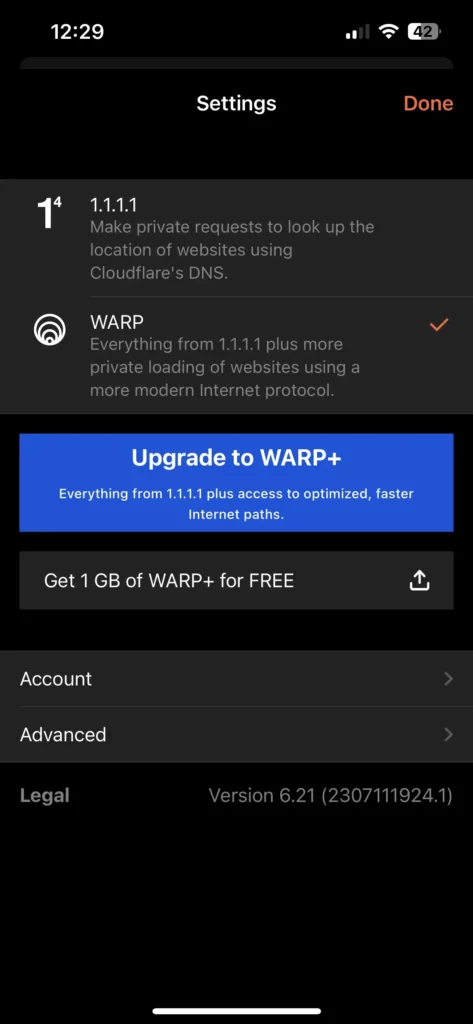
In short, 1.1.1.1 only works on your DNS requests, but WARP also encrypts the online traffic like any typical VPN like Surfshark.
As of this writing, 1.1.1.1 is completely free, but WARP has paid plans too.
First, you can download 1.1.1.1 from the App Store. Accept the terms and tap Install VPN Profile, and allow changes when prompted.
Once you do this and turn the toggle on you’ll see WARP branding on the dashboard:
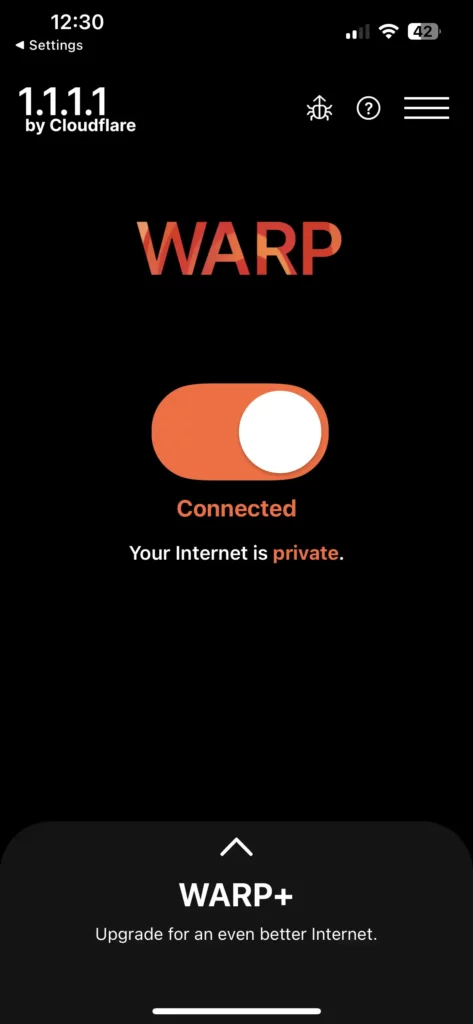
This means the VPN is not active, encrypting the DNS requests as well as the network activity traffic.
You can either use this or switch to 1.1.1.1 from the settings. For that, tap the hamburger icon on the top right and select 1.1.1.1.
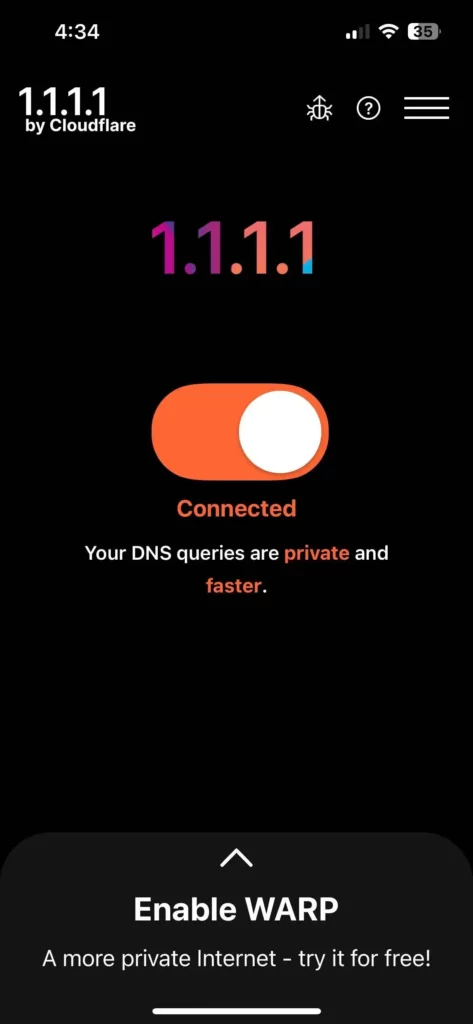
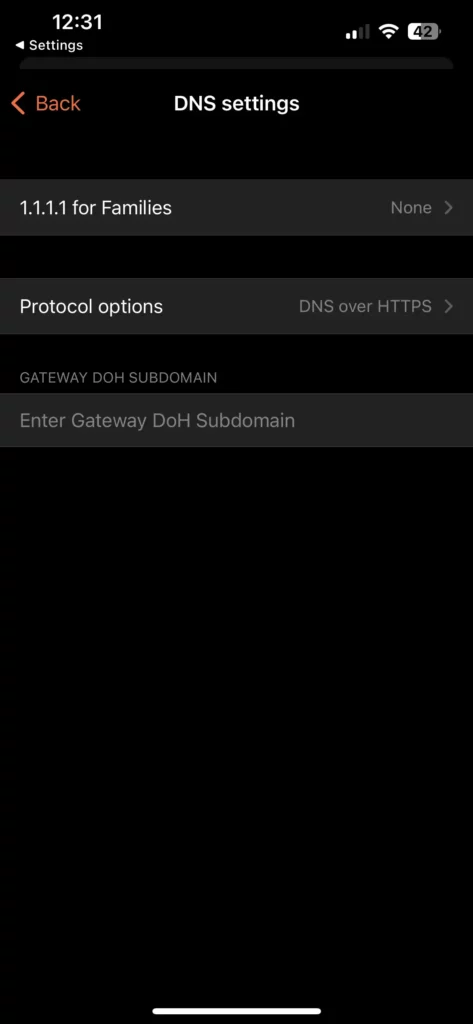
The biggest advantage of using 1.1.1.1 is there is no speed throttling and it’s completely free. One can check in the DNS settings that it used HTTPS for encryption.
To sum it up, there are there modes in this Cloudflare application:
- 1.1.1.1: Encrypted DNS, Fastest (Standard ISP speeds)
- WARP: Encrypts DNS requests and network data, Free, a bit slow
- WARP+: Encrypts DNS requests and network data, Faster, Paid or refer to others for getting free data credits
Overall, the app is decent and serves its purpose very well.
Conclusion
Setting up a private DNS on your devices can be a simple yet effective way to enhance the privacy of your online activities.
By encrypting the connection between your device and the DNS server, you can prevent third parties (ISP, your government, etc.) from intercepting and viewing your DNS requests. This can help protect your data from being tracked or monitored, as well as prevent DNS spoofing attacks.
PS: Though people assume VPNs as one-stop privacy solutions, let’s check out if VPN’s can be tracked and how to maximize anonymity.