There are not many options as of now, and exactly one method to flip an image in Google docs that we’ll see. Stay tuned!
Google docs lacks a powerful image editor. I have tried some extensions and add-ons, but couldn’t find anything to brush up on the images as I wished.
There are options including color overlay, resize, rotation, etc., but creators like us clearly need more. One of the troublesome things to do with Google Docs images is to have the mirror effect, also known as flip.
One solution is using external image editors to flip and then import them back. However, there is one inbuilt solution to help you with this that we are going to see.
Flipping Images in Google Docs
There are two ways to do this depending upon if the image is already there or a new import.
Fliping Existing Images
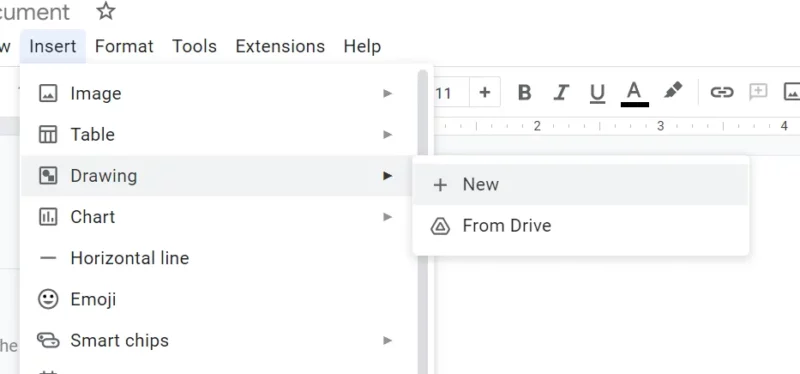
Put simply, you would cut/copy the subject image and head towards the Insert (in the top menu) > Drawing > New.
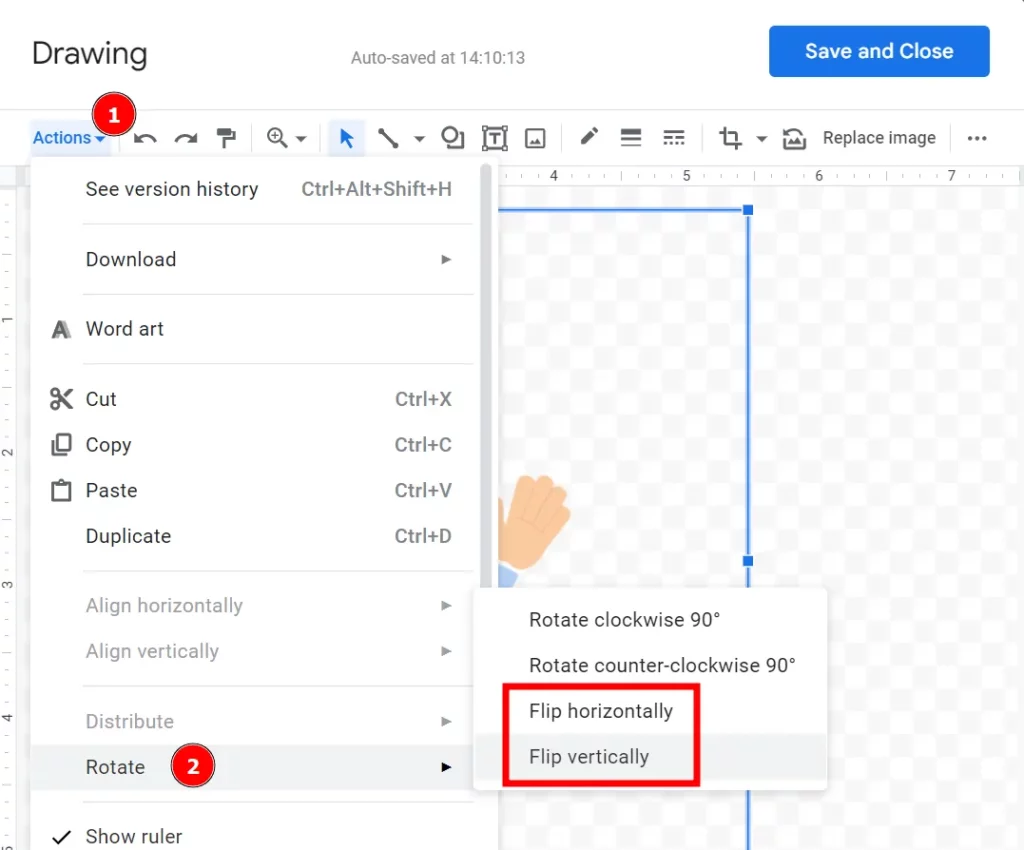
Now press Ctrl+v to paste the image. Subsequently, click Actions > Rotate, and choose Flip horizontally or Flip vertically.
This will insert the subject image with the intended flip operation.
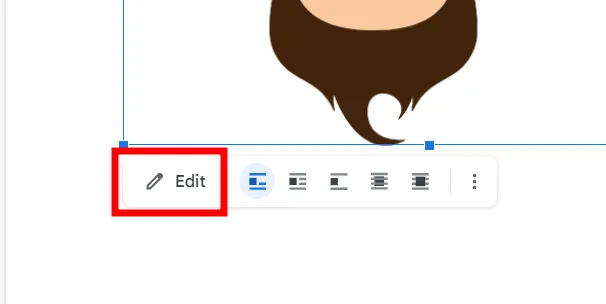
Once edited in the Drawing tool, every such image will show an Edit tab upon selecting that takes you directly to the Drawing menu.
New Imports
The previous method is not convenient if you have an image-heavy document.
In such a case, the best thing to do is use the Drawing tool to import images and avoid the conventional image insert.
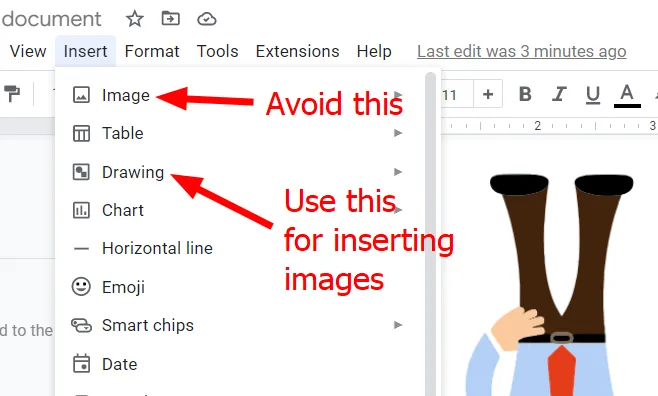
You may feel strange at first, but this is similar and will cut a few steps for efficient image editing.
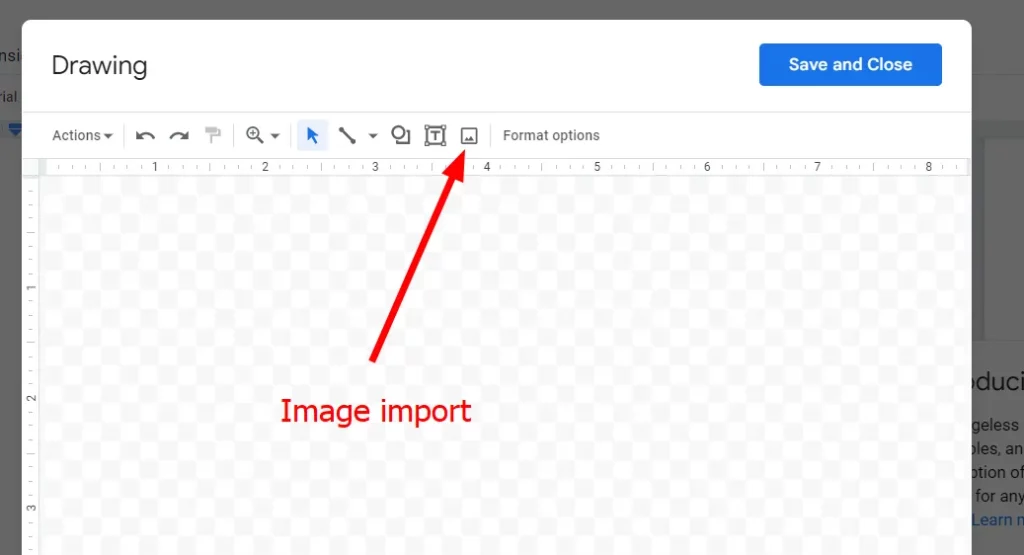
Additionally, images imported with this method will have the Edit option by default to open the drawing dashboard with just a click.
So this was about flipping images in Google docs.
Still, if you routinely image edit (or screen record on windows), I would suggest trying this free and open-source tool, ShareX. This comes as an installation and is extremely simple to use.
PS: You can also check how to alphabetize in Google Docs.
