Let’s check how you can change WordPress font with or without plugins and compare the website performance with each method.
Fonts are a far more important part of any web project than some might appear at first glance. And the existence of paid fonts (like that at fontshop.com) shouts this fact out loud.
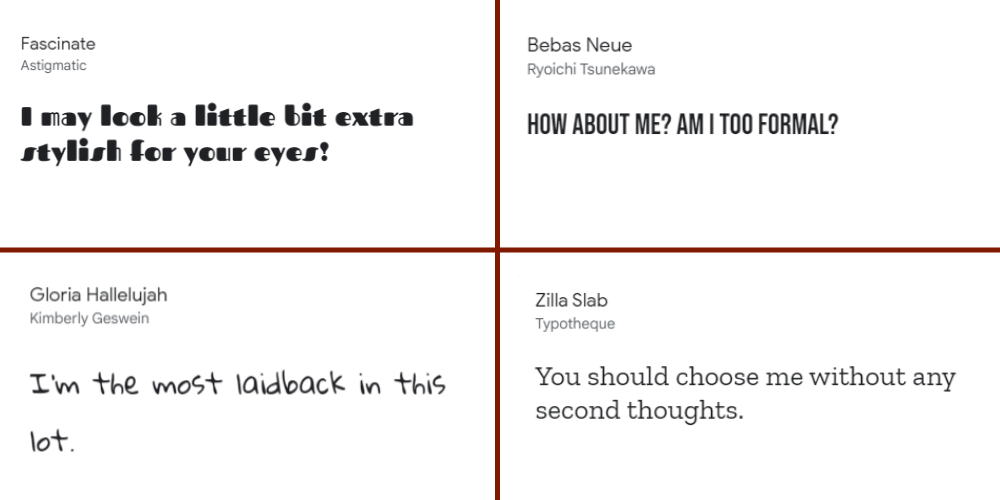
A carefully chosen font can improve readability, look appealing and make you stand out from the rest. In contrast, an over-the-top fancy-looking font may help you look unique but may not serve the purpose right resulting in a fleeing audience.
Ideally, you should pick one for your brand and stick with it. But, there are instances where one may use different fonts on the same web page, and that’s subjective to one’s taste. Personally, I prefer using a single font on my website to make look everything connected.
Change Font in WordPress
While changing the fonts looks pretty straightforward, it requires some tweaking if you don’t want to compromise with website performance and yet use fonts that aren’t there on your web server.
So overall, there are three cases in which you can alter fonts in WordPress:
- From within the theme
- Using web fonts (with & without plugins)
- Local Hosting at Website Server (not as typical as it sounds)
We’ll see each one with the effect on page load times.
So without any ado, let’s start with the first.
Change Fonts Within Theme
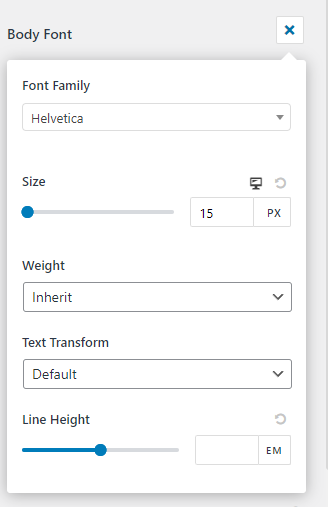
For this, we will take one of the most popular themes on WordPress, Astra, with 1 million+ downloads and 4900+ five-star ratings. Though we can’t cover all the themes, it’s pretty much similar in all of the WordPress, and you can change fonts in the typography section under WordPress customizer.
Particularly for Astra, you need to navigate to the WordPress dashboard and click Appreance>Customize>Global>Typography>Body Font.
Using Google Fonts, on the contrary, will affect the website’s loading time adversely. But we won’t go with just statements here, but compare the effect of each method on page loading in the performance section later in the article.
Using Web-Fonts
Most webmasters use this method to change fonts in WordPress websites with themes not having native support for Google Fonts.
Though there are other options like Adobe Fonts (previously Typekit) as well, we’ll stick to Google Fonts since they are free and have an excellent library of font styles.
You can achieve this in two ways:
- Adding a code snippet into the HTML head of your theme.
- Using a Plugin to insert code
While both the methods are quite simple, the first one can become problematic if you’re changing the theme files of a production website the wrong way. So the best way is to create a staging website or have something like 1-click restore facility at your web hosting provider. That being said, it’s just pasting a few lines of code and not some geeks-only thing.
So, hold tight and we’ll get through.
Adding a code snippet into the HTML head
You need to find out the head element in the header.php file of your theme.
Since I’m using Generate Press theme, I’ll show where it is in my case.
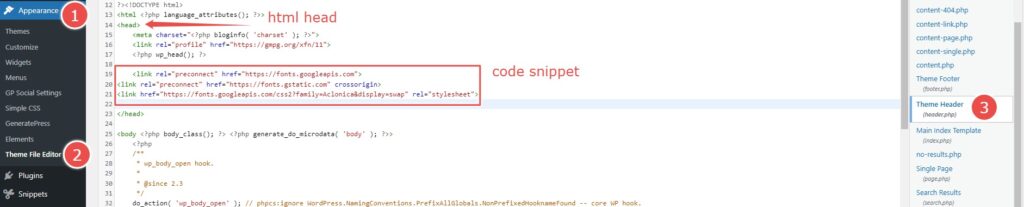
I have also confirmed it in the Astra theme, and you’ll find it similarly, at the top of the header.php file.
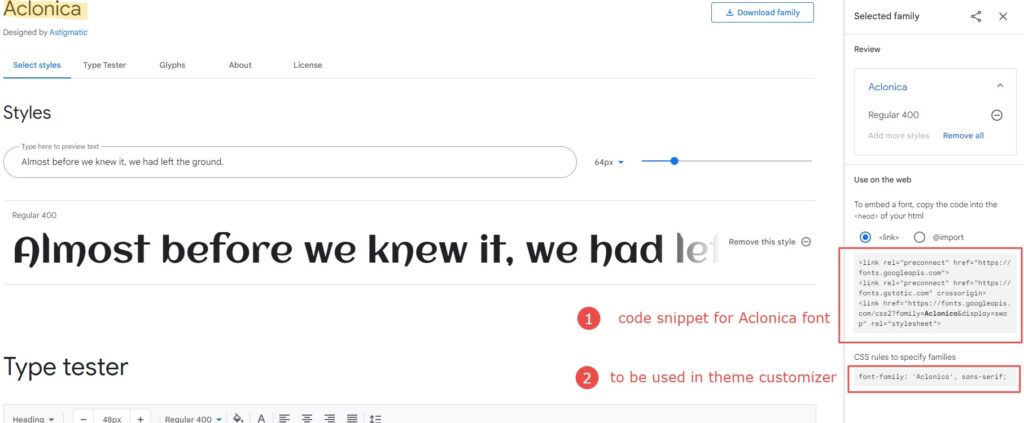
Now the code snippet. Obviously, that’s specific to your font, and you can find that by selecting any font style in Google fonts.
Don’t forget to update the header.php after putting in the code. The update button will be at the bottom of the same page.
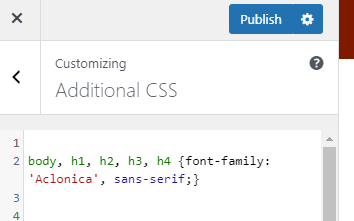
Next, paste the CSS (marked by 2) in the Additional CSS section in the theme customizer side panel and hit publish. Remember, the code inside the parenthesis {} is taken from the font provider (Google Fonts in this case), and the class (body, h1, h2…) is where you want to apply this.
Similarly, you can also use different fonts on your web page. In that case, you’ll need to put all code snippets in the head section of header.php and use CSS accordingly for specific text classes.
Using a Plugin
This is the simpler to change fonts if you don’t mind installing yet another plugin on your WordPress website. There are loads of plugins for using Google Fonts, and I’ve randomly picked the first one having maximum installations and excellent ratings.
Besides, this has been updated just 3 weeks ago and is compatible with my WordPress version.
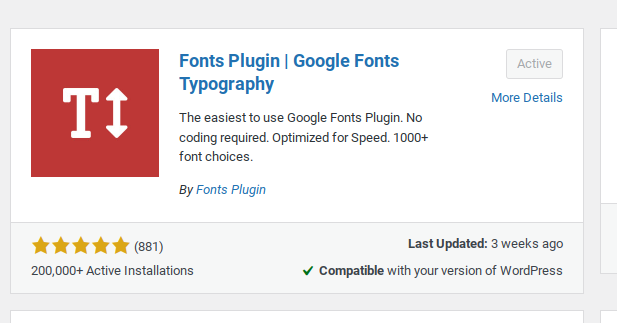
Ergo, I went ahead to install and activate this. This allowed me to change fonts for each element separately inside the customizer itself.

For instance, you can use separate fonts for navigation, content body, brand title, sidebars, footer, etc. While this may look good (to some), keep in mind the loading times with each addition.
So this was using the third-party fonts with a plugin, arguably the easiest method to load web fonts. Still, I’ll recommend using the code snippet method to avoid using a plugin.
Local Hosting at Website Server
Changing WordPress fonts by local hosting involves a few one-time steps to set up which can feel complicated at first. But the process is really simple and most reliable for using custom fonts.
This is the case where you download the fonts, paste them in some directory in the public html, and call it from there.
This is the best case for using custom fonts without relying on third parties to serve them, as was with web fonts. Because using web fonts is fine if you don’t mind some performance drag. Moreover, it adds a variable that can go wrong anytime.
For instance, Adobe Typekit (premium fonts provider) went down in 2015, pushing the sites back to the default fonts, a less aesthetic and awkward user experience.
But those websites would still be unaffected had they hosted fonts on their web servers. Besides, this takes less toll on the performance, just slightly more than using system fonts.
However, the process of adding files to the web server can be daunting to some. But essentially, we will be creating a folder, pasting some files, and adding some CSS to the theme customizer.
And again, you can do this by using any File Manager plugin, or via an FTP client such as FileZilla if you have SFTP access.
The second method is where you connect to your web server IP address with a username, password, and a designated port number. Check with your web hosting provider if you have these permissions.
Let’s check each one step-by-step.
Using File Manager Plugin
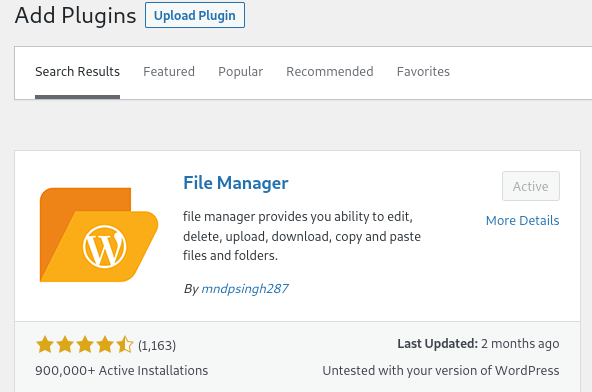
You will see tons of plugins for this too. Use anyone you prefer, as this is a one-time thing, and you can delete the plugin after following these steps.
I have used this File Manager plugin:
In short, we will be creating a folder in public_html named Fonts (but you can name it anything). The important part is taking the URLs of the transferred files and using them in the theme customizer.
So technically, it’s like using the web fonts but from your own web servers.
Additionally, you need to be careful about the browser support as Google font downloads will be in .ttf format, whereas the most recent are .woff and .woff2.
While all have near equivalent support (you can check at caniuse.com/x, replace ‘x’ with font format), the .woff2 format has the least font size.
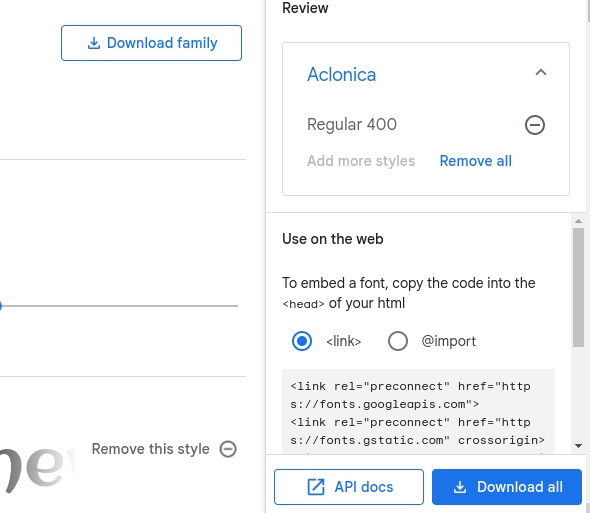
For instance, the Aclonica font file weighing 52.8 KB in .ttf was just 29.6 KB in .woff and 21.8 KB in .woff2.
And you can use something like Cloudconvert, and upload whichever suits your target audience. If you ask me, I will suggest using .woff and .woff2.
Besides, remember to use font weights you’ll actually use and remove the unnecessary ones.
However, our test font Aclonica comes only in one weight–Regular 400.
Once you download the files, convert them into desired formats before uploading. The plugin you downloaded will show up in the WordPress dashboard side panel.
Click that, select the public_html, right-click, and click New folder in the pop-up (you can name this Fonts).

Subsequently, transfer the font files in there by either using the upload icon or selecting and dragging them at once.
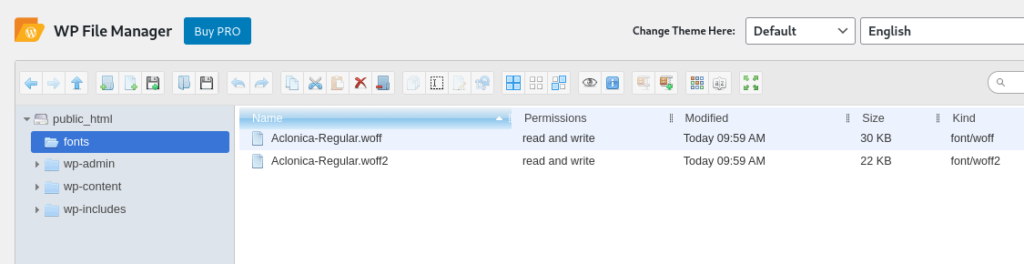
Now right-click each font file, and select Get Info & Share at the bottom of the pop-up.


Repeat this for each uploaded file and collect them in a text file* we’ll be using up next.
Now we have the files on our server, it’s time to use the @font-face function in the Additional CSS section to call these fonts when needed.
body, h1, h2, h3, h4 {font-family: 'Aclonica', sans-serif;}

@font-face {
font-family: 'Aclonica';
src: url('https://yourdomain.com/fonts/Acolnica-Regular.woff') format('woff'),
url('https://yourdomain.com/fonts/Aclonica-Regular.woff2') format('woff2');
font-weight: normal;
font-style: normal;
}
Please note that we are using only a single font (Aclonica) with two formats .woff& .woff2. So you will be modifying this file according to your needs. Most importantly, use the correct URLs (*saved in that text file earlier), and ensure using the same font family name.
For instance, If I have to use italics in the h1 heading of a font family ABC, and regular fonts everywhere else from the same ABC font family, then the code will be:
body, h2, h3, h4 {font-family: 'ABC-regular', Arial, sans-serif;}

h1 {font-family: 'ABC-italic', Arial, sans-serif;}


@font-face {
 font-family: 'ABC-regular';
 src: url('https://yourdomain.com/fonts/ABC-regular.woff') format('woff'),
        url('https://yourdomain.com/fonts/ABC-regular.woff2') format('woff2');
 font-weight: normal;
 font-style: normal;
}

@font-face {
 font-family: 'ABC-italic';
 src: url('https://yourdomain.com/fonts/ABC-italic.woff') format('woff'),
	 url('https://yourdomain.com/fonts/ABC-italic.woff2') format('woff2');

 font-weight: normal;
 font-style: normal;
}
And as usual, you will be pasting this code within the Additional CSS section inside the theme customizer.
Using FTP Client (FileZilla)
If you don’t want to use any file manager plugin, you need to have FTP access to transfer the files. Confirm this with your web host and obtain the username, password, port number, and host address.
Typically, your web host will have tutorials about how to access the web directory using FTP. Besides, you can ask the support for assistance.
So get all the credentials, open the FileZilla FTP client, enter them, and hit Quickconnect.
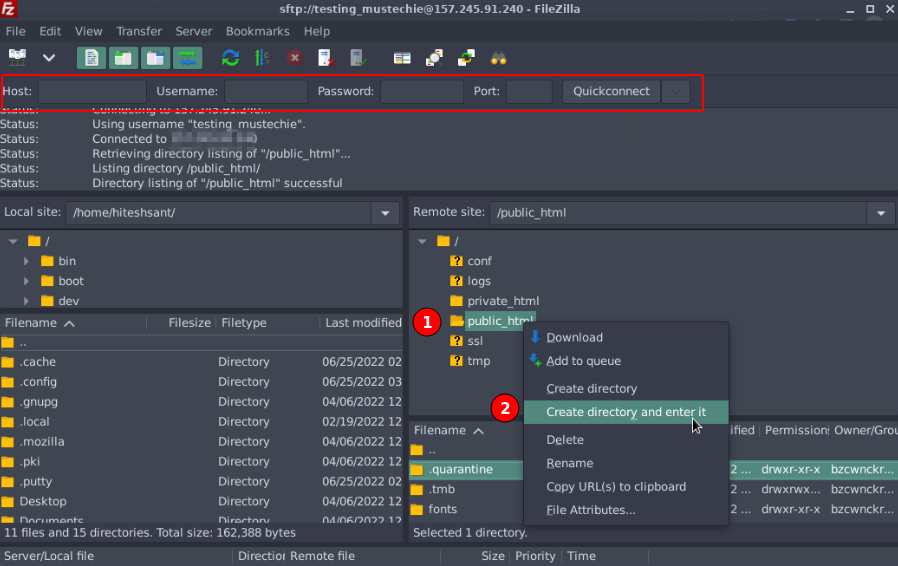
If everything goes smoothly, you’ll see your server directories on the right side. Subsequently, right-click on the public_html, then click Create directory and enter it, and name that fonts.
Now open the downloaded files on the left (that’s your computer), select them, and drag to the newly created folder on the right (into the server).
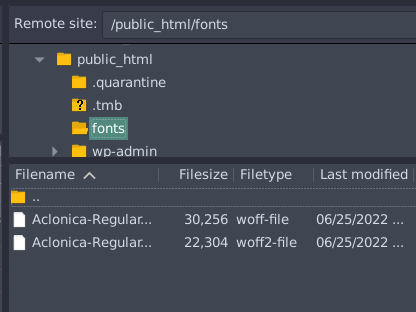
For instance, URL address of the file named ‘Aclonica-Regular.woff’ in ‘fonts’ sitting under ‘public_html’ will be
https://yourdomain.com/fonts/Aclonica-Regular.woff/Similarly, write down the address of each file, and follow these steps which are identical to the previous method.
So this ends some possible ways to change the font in WordPress. Now we’ll see how these methods will affect a webpage’s performance.
Performance Impact
There are two major things to take into account: Google Lighthouse performance score (measured with web.dev/measure) and font contribution in the total page size (measured by Pingdom’s website speed test). Still, we’ll list the page loading time and HTTP requests as well.
All tests were done twice on a single web page, and I cleared the cache every single time to ensure the tools fetch the latest version.
These are the results:
| Performance Score | Font Overhead | Page Load Time | HTTP Requests | |
| System Fonts | 84 | 0 | 1.09s | 43 |
| Web Fonts via plugin | 76 | 37.1 KB | 1.12s | 47 |
| Web Fonts via code snippet | 75 | 18.3 KB | 1.10s | 45 |
| Local Hosting | 79 | 30.8 KB | 1.09s | 44 |
Of these all, the most ambiguous is page load time, and I wouldn’t take that all too seriously. Because this metric depends on countless variables and changes every single time.
What matters more is the performance score and number of HTTP requests. And over there, system fonts triumph all, which was expected.
While its victory margin isn’t substantial, it could be, had we used more font weights or different fonts on the web page.
But the crux of this test is that you can use a single font with one or two font weights without affecting the performance much. In addition, using web fonts via code snippet isn’t bad either. Just that you would rely on some third-party servers, which can fail occasionally.
Wrapping Up
While using a plugin won’t break your website right away, plugins are the most vulnerable part of most WordPress websites. Sometimes they don’t get updated often causing compatibility issues or leave junk in the site database after uninstallation. Besides, plugins are the no. 1 security concern for any web developer.
So the easiest method to change the font in WordPress remains within the theme, and most modern themes give a great choice with support to Google fonts for that matter. And if your theme doesn’t have native support for Google fonts, maybe it’s time to switch to a good one. And I recommend Generate Press, which also happens to be the current theme on Mustechie.