There are multiple ways for indentation in Google Docs, including hanging indent. Let’s see how to apply each.
Indents are generally used to start a new paragraph in various style guides (Chicago, APA, MLA, etc.). But they aren’t limited to formal settings.
For instance, the opening paragraph (blockquote) of this article is left-indented. Besides, indentation is used heavily in most programming languages.

While it’s easy to manually indent any Google doc paragraph by simply using the spacebar, the process isn’t as accurate and is tedious for a long document consisting of multiple pages.
So we will see how to apply indent to the whole document (or the selected text) in one go in addition to its types.
Google Docs Indents
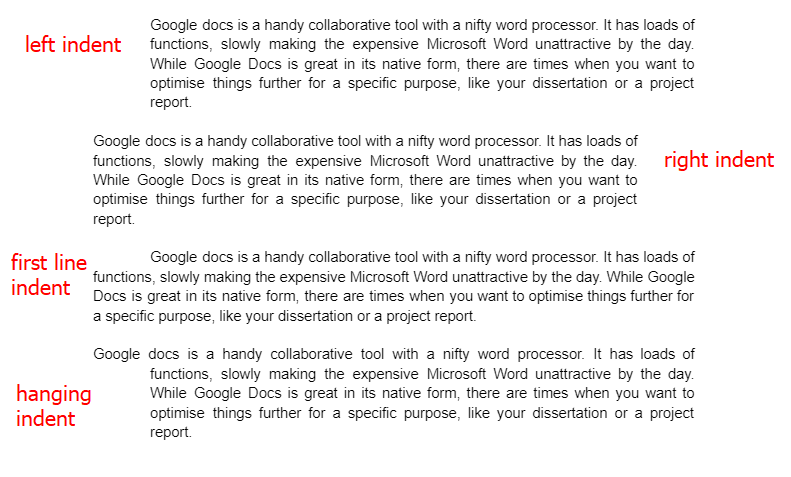
There are four ways to indent in Google Docs:
- Left Indent
- Right Indent
- First Line Indent
- Hanging Indent
Depending on the style guide, you may want to use one or more in a single document. And based on the type you can have them either with the ruler or within the menu.
Let’s start with the obvious.
Applying Indent with Ruler
Except for hanging, the Google docs ruler can help you apply all the other three.
You’ll see three options, (Left) Indent, First Line Indent, and the third one, Google Doc Margins, which isn’t related to this.
Now all you have to do is select the subject paragraph(s), hover on the ruler, and adjust the indent accordingly.
Similarly, you can set the right indent. And yes, click View in the menu, and check Show Ruler if you don’t see it.
So this was the easiest way to get it without tinkering with anything inside the menu. But, you may have trouble selecting the text in an extremely large document. In addition, if you have noticed, the ruler manages indents (and margins) in 0.25 intervals. Ergo, you can’t set an indent, say of 0.15 with the ruler, which brings us to…
Applying Indent Within Menu
This is a more sophisticated way of doing things with custom indent values.
Start with selecting the subject text, and then navigate to Format > Align & indent > Indentation options. This will open:
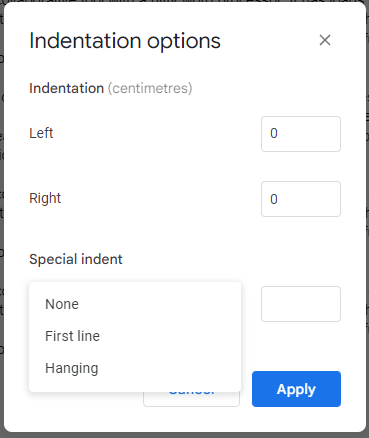
You can use any value and hit Apply to set indent accordingly. This option also lets you simultaneously apply the First line and Hanging indent with the left and/or right indent.
However, if you want to play only with the left indent, there is an even easier way. Just put the cursor anywhere in the specific paragraph and click these options as indicated in the image.
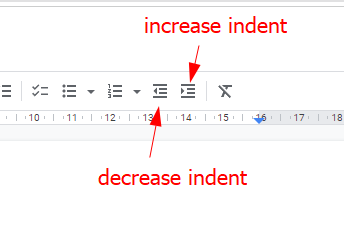
You can also use keyboard shortcuts:
increase indent: ctrl+]
decrease indent: ctrl+[
Conclusion
So this was about the types of indent and the ways in which you can apply them. To summarize, the ruler can help you set the left, right, and first-line indent, whereas the Indentation options sitting inside the menu can apply hanging indent as well.
PS: Head over to our Google Doc Margin guide to further style your text.