Let’s be done with it quickly by checking a few ways to add borders in Google docs.
Google Docs is the word processor of choice for non-MS Word and non-Mac people. It has just enough features, and the collaboration gives it an edge over others.
And let’s be honest, it is tough to abandon the Google ecosystem, especially if you hate or can’t afford Macs.
Adding Border in Google Docs
Coming to the point, there are two standard ways of adding borders that we will see.
Borders and shading
First, select the text you want to emborder. Next, navigate to Format > Paragraph styles > Borders and Shading.
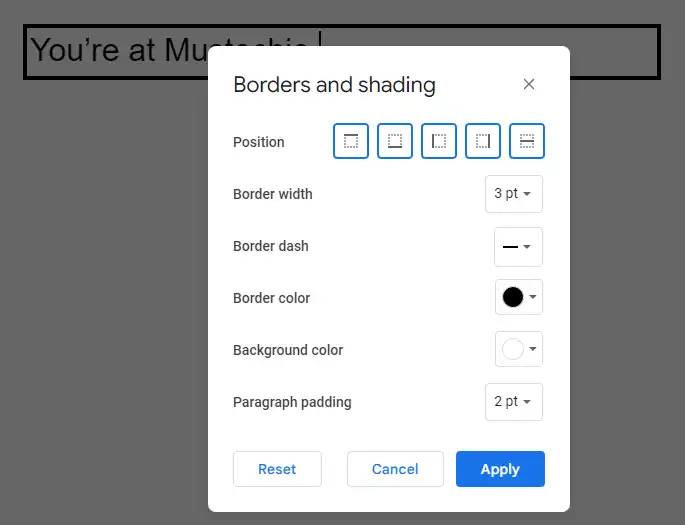
Here, you can select the border position, width, type, etc., before clicking Apply at the bottom.
That was it. The first and the supposed-to way of doing it.
Let’s move to the next.
Single-cell table
As evident by the name, include a single-cell table and paste the content inside it.
You can do this from the Insert > Table and select 1×1.
This gives you fewer controls over the border, with the available options limited to the border, its background color, and width.
However, it helps you become more creative with something like this:

You can adjust the row height, column width, alignment, and much more within the Table properties to create, which isn’t always possible with the Borders and shading method.
Click inside any table for the properties to come alive at the right sidebar in Google docs.
So, this was with Google docs borders.
A similar tutorial awaits you at how to flip an image in Google docs.